

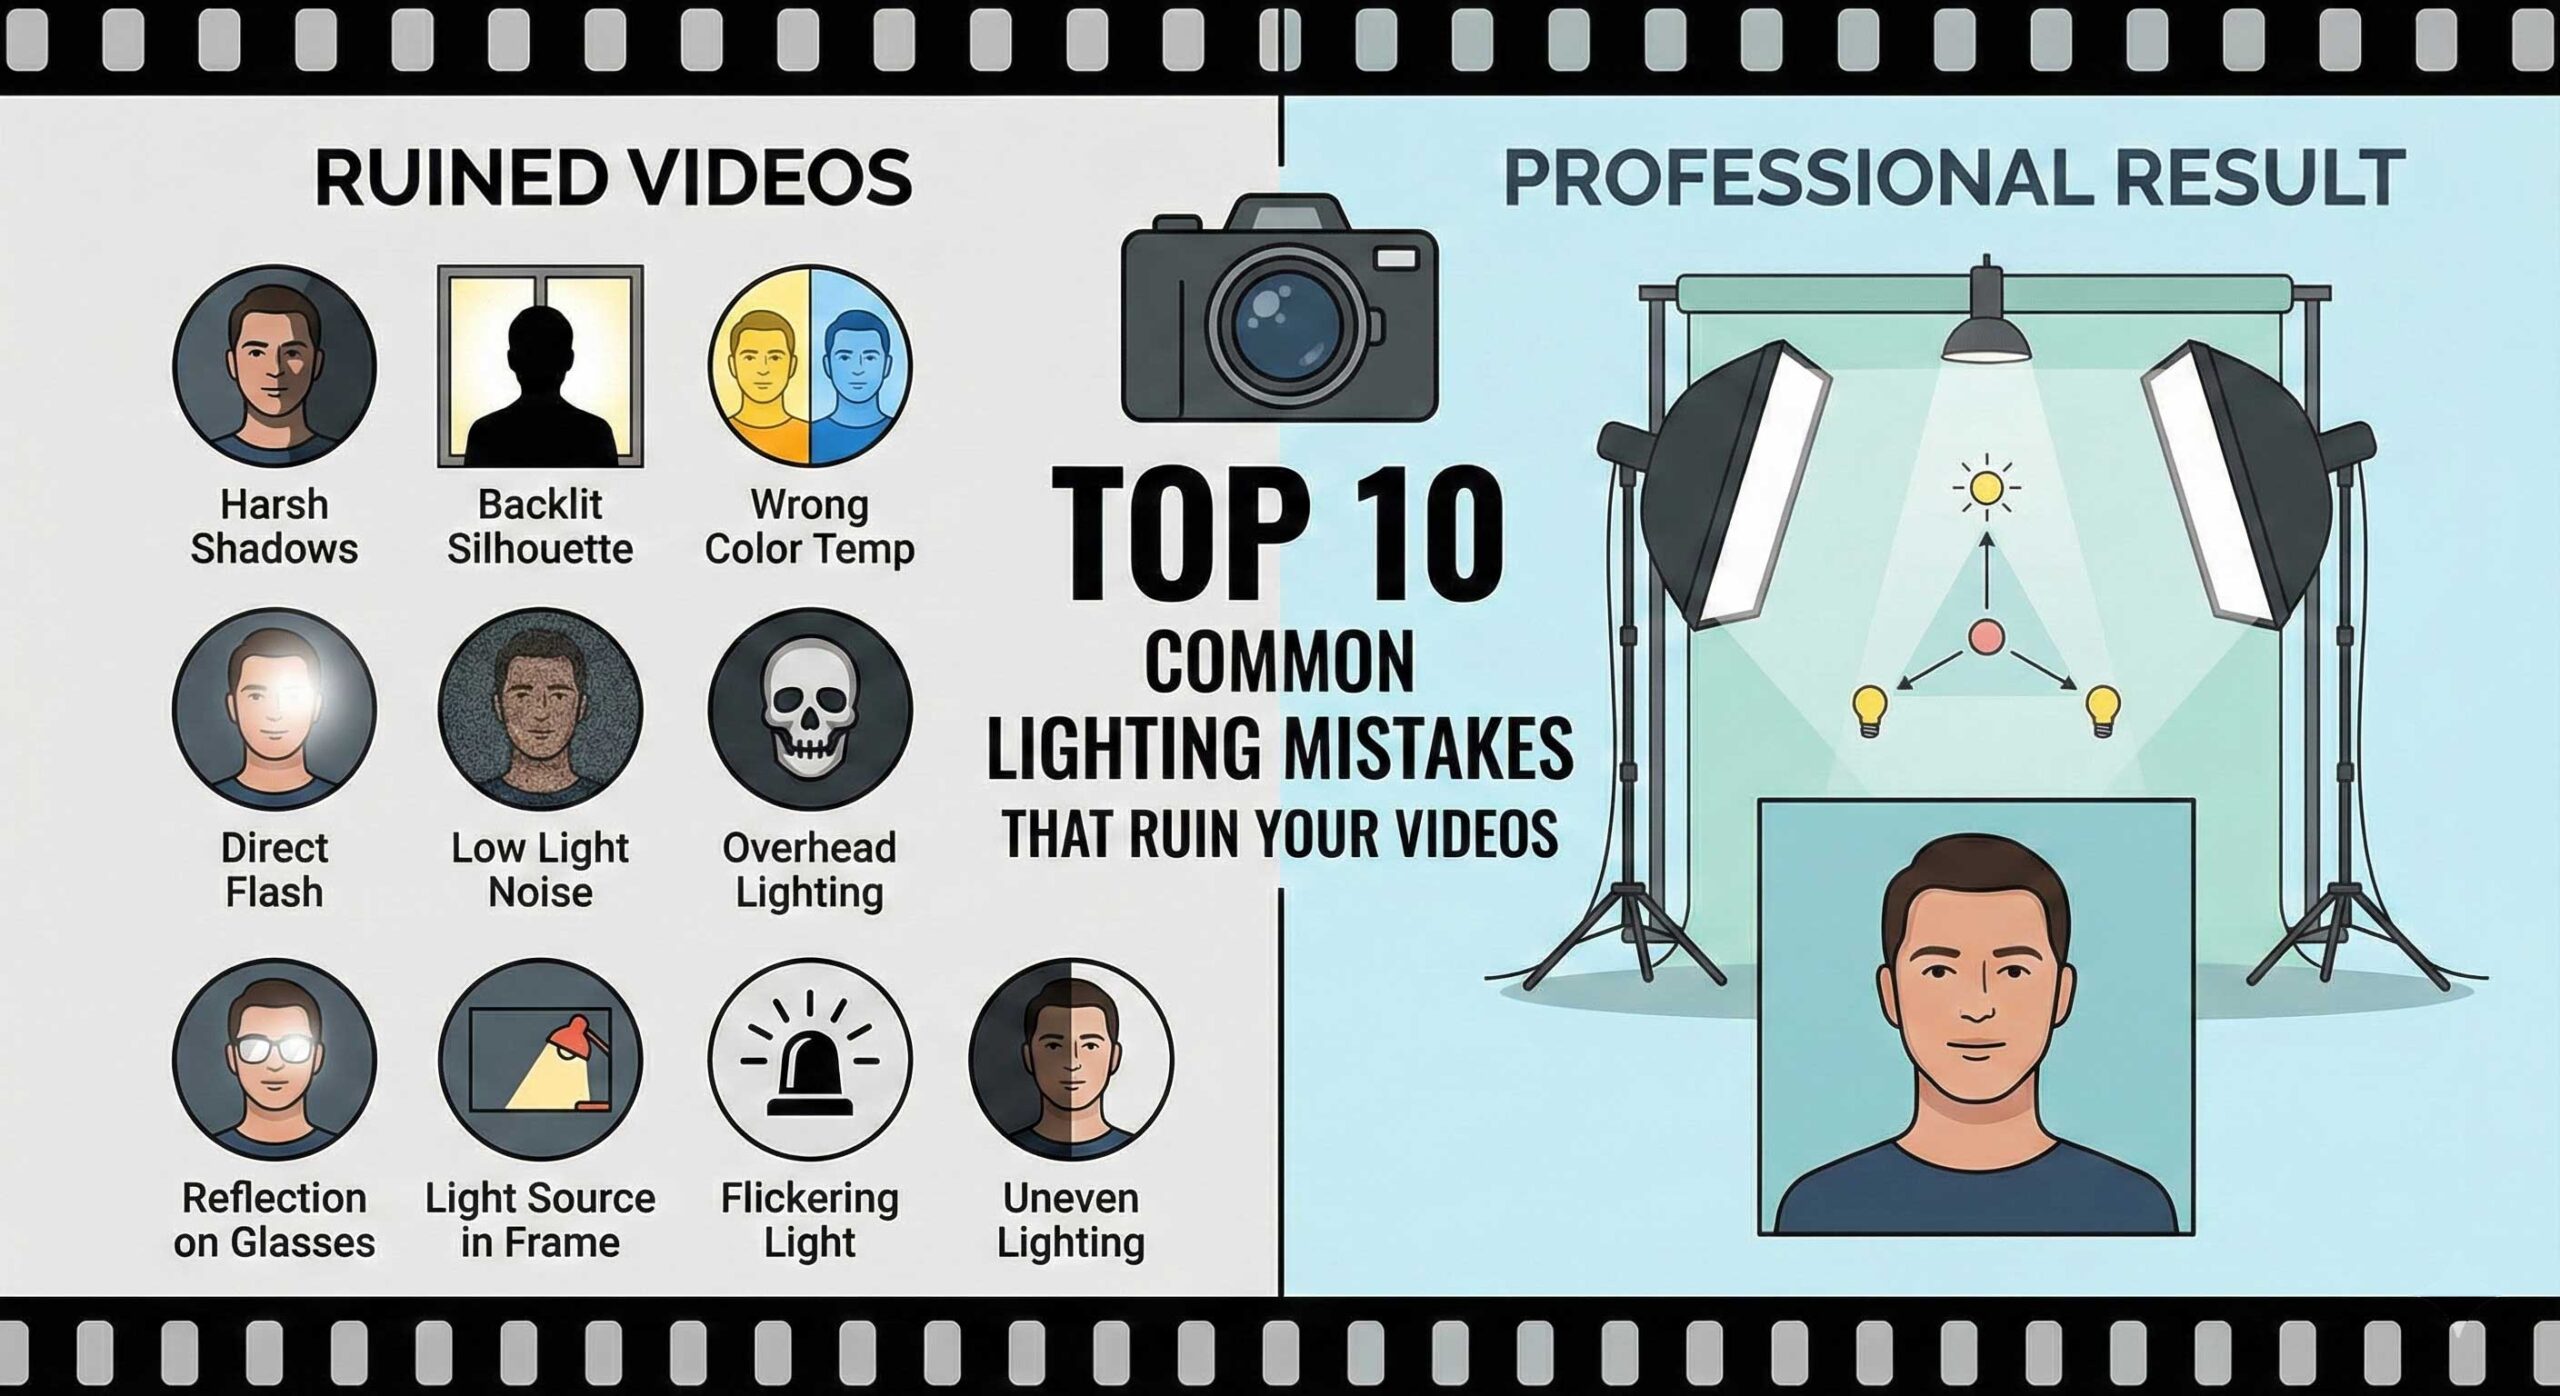
Even with expensive cameras and professional editing software, poor lighting can instantly destroy the quality of your videos. Many content creators unknowingly make lighting mistakes that sabotage their hard work, leaving viewers clicking away within seconds. Understanding and avoiding these common pitfalls is crucial for anyone serious about creating professional-looking content. This guide identifies the ten most frequent lighting mistakes and provides practical solutions to fix them immediately.
1. Using Only Overhead Lighting
The single most common mistake beginners make is relying exclusively on ceiling lights or overhead fixtures. Overhead lighting creates harsh shadows under the eyes, nose, and chin—often called “horror movie lighting” because it makes subjects look tired, older, and generally unflattering.
Ceiling lights are designed to illuminate rooms, not faces. They create downward shadows that accentuate every imperfection and make even attractive people look haggard on camera. The solution is simple: turn off overhead lights and use dedicated video lights positioned at eye level or slightly above. The YanBeam CT 250 bi positioned correctly at 45 degrees provides flattering illumination that overhead fixtures can never achieve.
2. Mixing Different Color Temperatures
Walk into any amateur creator’s setup, and you’ll often find warm tungsten bulbs mixed with cool LED lights and natural daylight streaming through windows. This creates a color temperature nightmare where skin tones shift between orange, blue, and green within a single frame.
Your eyes naturally adjust to mixed lighting, but cameras don’t. The result is unnatural-looking footage that screams “amateur” to viewers. The fix requires either controlling all light sources to match or using bi-color lights that can adapt. The YanBeam CT 450 Bi allows you to match any ambient lighting condition, whether you’re shooting in warm interior spaces or near cool daylight windows.
All lights in your setup should be set to the same Kelvin temperature. If you’re filming near windows, set your artificial lights to 5500K-6500K to match daylight. For evening shoots without natural light, 3200K-4000K creates a warm, inviting atmosphere.
3. Positioning Lights Too Close to Subjects
When beginners get their first video light, excitement often leads them to place it mere inches from their face. This creates several problems: harsh shadows with hard edges, uncomfortable heat, visible hot spots, and an overall unnatural look that immediately identifies amateur productions.
Light quality improves with distance. Larger, softer shadows that wrap naturally around facial features come from lights positioned several feet away from subjects. Professional lights provide sufficient output to work effectively at proper distances, giving you the flexibility to position lights where they create the most flattering results.
Start with your key light at least three to four feet from your subject. If it’s too dim at that distance, increase the power rather than moving it closer. This single adjustment dramatically improves how professional your videos appear.
4. Ignoring Background Lighting
Many creators obsess over lighting their face perfectly while completely ignoring their background. The result is a well-lit subject floating against a dark, murky background that looks unprofessional and can actually make your subject harder to see due to lack of separation.
Professional videos create separation between subject and background through deliberate background lighting. This doesn’t require elaborate setups—a single light pointed at the wall behind you creates depth and dimension. The YanBeam RGB Flatlight RS20 works brilliantly for this purpose, offering both natural white light for subtle separation and RGB colors when you want creative backgrounds that enhance your content’s visual appeal.
Even simple background lighting transforms production value immediately. Viewers may not consciously notice the difference, but they’ll subconsciously perceive your content as more professional and engaging.
5. Creating Harsh Shadows Under the Eyes
Dark circles and shadows under the eyes make everyone look tired and unprofessional. This typically happens when your key light is positioned too high without adequate fill light to soften shadows. The problem becomes especially pronounced for people with deeper-set eyes or prominent brow bones.
The solution involves two adjustments: lowering your key light slightly and adding proper fill lighting. Your fill light should be positioned opposite your key light at roughly eye level, with brightness set to about 50% of your key light intensity. The YanBeam Softlight SL360 BI excels as a fill light because its naturally diffused output creates gentle shadow fill without harsh edges or competing shadows.
Test your lighting by looking at your camera monitor from different angles. If you see pronounced dark circles under your eyes, adjust your fill light position or increase its brightness until shadows soften to natural-looking levels.
6. Overlooking the Importance of Light Quality
Not all lights are created equal, and many beginners make the mistake of choosing lights based solely on brightness or price without considering light quality. Poor quality lights create several problems: inaccurate color reproduction, visible color shifts between different power levels, flickering that appears in footage, and harsh, unflattering illumination regardless of positioning.
Color Rendering Index (CRI) measures how accurately a light reproduces colors compared to natural daylight. Lights with CRI below 90 can make skin tones look sickly, make products appear different colors than they actually are, and create an overall “cheap” look that immediately identifies low-quality production.
Professional lights maintain high CRI ratings above 95, ensuring accurate color representation crucial for beauty content, product reviews, and any situation where color accuracy matters. Investing in quality lighting from the start saves money long-term and ensures your content maintains professional standards.
7. Using Only One Light Source
Single-light setups can work in specific situations, but many creators limit themselves unnecessarily by using only one light and wondering why their videos still look amateur. One light creates pronounced shadows on one side of the face, flat two-dimensional appearance without depth, and harsh contrast between lit and shadow areas.
Professional lighting almost always involves multiple lights working together. At minimum, you need a key light and fill light. Adding a back light for separation elevates production value further. This doesn’t require expensive investments—you can build your lighting setup gradually, starting with one quality light and adding more as your content and budget grow.
Begin with a versatile key light that can serve multiple purposes as your setup expands. As you add lights, you’ll immediately notice improved depth, dimension, and professional appearance in your videos.
8. Neglecting to Test Lighting Before Filming
Too many creators set up lights quickly, hit record, and discover problems only during editing when it’s too late to fix them. Common issues discovered post-production include overexposure that blows out highlights, underexposure that makes footage grainy and unprofessional, unnatural color casts from mixed lighting, and harsh shadows that distract from content.
Always record test footage before starting your actual filming session. Watch this test footage on your camera’s monitor or a larger screen to identify problems while you can still fix them. Pay attention to skin tones, shadow placement, background lighting, and overall exposure levels.
This testing phase takes only a few minutes but saves hours of frustration during editing. Lighting problems are nearly impossible to fix in post-production—prevention through proper setup is essential.
9. Forgetting About Light Modifiers
Many beginners invest in good lights but never use modifiers like softboxes, umbrellas, or diffusion panels. This means they’re getting hard, direct light when most situations call for soft, diffused illumination. Direct light creates harsh shadows with hard edges, emphasizes skin texture and imperfections, and generally looks unflattering on most subjects.
Light modifiers transform harsh direct light into soft, wrapping illumination that flatters subjects and creates professional-looking results. Softboxes diffuse light across a large surface area. Umbrellas bounce and spread light. Diffusion panels soften direct beams. Each modifier type serves specific purposes, but all improve light quality dramatically.
Some professional lights feature built-in diffusion, providing soft light output without additional modifiers. For lights without built-in diffusion, investing in basic modifiers makes a dramatic difference in your lighting quality.
10. Inconsistent Lighting Between Videos
Many creators set up lighting differently for each video, resulting in inconsistent looks across their content. Viewers notice this inconsistency even if they can’t articulate what’s different. It makes your channel feel disorganized and amateur rather than professional and intentional.
Consistency builds brand recognition. Your lighting setup should be repeatable, creating the same look across all your videos. This doesn’t mean you can’t adjust for different content types, but your standard setup should remain consistent for similar content.
Document your lighting setup with photos and measurements. Mark floor positions with tape if necessary. Create a simple diagram showing light positions, angles, and settings. For RGB accent lighting, compact smart lights like the Dreamlight Max App with wireless smartphone control make it easy to recall specific colors and effects consistently, ensuring your creative lighting choices remain identical across filming sessions.
Quick Fixes for Immediate Improvement
If you’re making multiple mistakes from this list, don’t feel overwhelmed. Focus on fixing one issue at a time, starting with the mistake having the biggest impact on your videos. For most creators, that means stopping reliance on overhead lighting and investing in a proper key light positioned correctly.
Start with basics: one good light positioned at 45 degrees from your camera, slightly above eye level, set to match your ambient color temperature. This single change typically improves video quality more than any other adjustment. From there, add fill lighting to soften shadows, then back lighting for separation.
Quality matters more than quantity. One well-positioned light creates better results than three mediocre lights randomly placed. Focus on understanding why each light is positioned where it is rather than following formulas blindly.
Learning From Your Mistakes
Every creator makes lighting mistakes, especially when starting out. The key is recognizing these mistakes quickly and correcting them rather than repeating them video after video. Watch your published content critically. Compare your lighting to creators you admire. Identify specific differences and experiment with adjustments.
Join content creator communities where you can share your work and receive constructive feedback. Other creators often spot lighting issues you’ve become blind to through familiarity. This outside perspective accelerates your learning curve dramatically.
Conclusion
Avoiding these ten common lighting mistakes immediately elevates your video quality from amateur to professional. You don’t need expensive equipment or years of experience—you need to understand basic principles and apply them consistently. Stop relying on overhead lighting, match your color temperatures, position lights properly, and test before filming.
Remember that lighting is one area where technique matters more than equipment. A creator who understands proper lighting placement and avoids these common mistakes will produce better-looking videos with basic equipment than someone with expensive gear who makes fundamental errors. Focus on mastering the basics before worrying about advanced techniques.
Start by identifying which mistakes you’re currently making, then systematically address them one at a time. The improvement in your video quality will be immediate and dramatic, leading to better engagement, faster channel growth, and more professional-looking content that stands out in crowded social media feeds.